Welcome to week 5 of the Indie Development Project. Previously, I worked on developing a user interface for Unreal Engine 4 by creating a Widget Blueprint to display a coin counter and health bar. After that was to set a trigger of a custom event that allows updating the user interface to display the current amount of collected coins in the game.
This week, I wanted to develop my level design skills within Unreal Engine by using landscape tools to sculpt and paint different materials like grass and stone to the map. Learning to do this in Unreal Engine would further improve my skills and also be able to create a scene to prototype quickly.
Recently, I saw that Unreal Engine 5 was just released for the public to use, and from seeing this, I would experiment around doing landscape so that I can also see what Unreal Engine 5 is like and get used to the new UI change.

The user interface (Figure 1) from Unreal Engine 5 looks simpler and easier to use than Unreal Engine 4 because some of the issues I had with version 4 was that I had more difficulty finding what I needed. Now, with Unreal Engine 5, I feel I could work more effective in the future with it; but, as version 5 is still new, I will still use version 4 for the project because I feel like version 5 could be less stable to use and would be safe to use 4 to avoid running into problems. However, I will make more use of version 5 after finishing developing the project to adapt my skills later on.

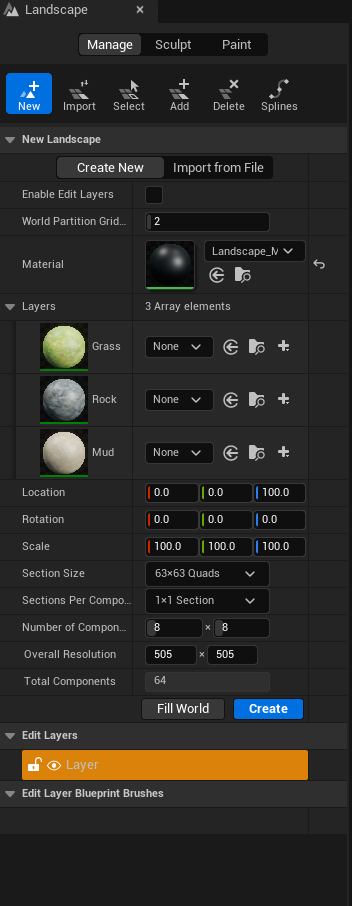
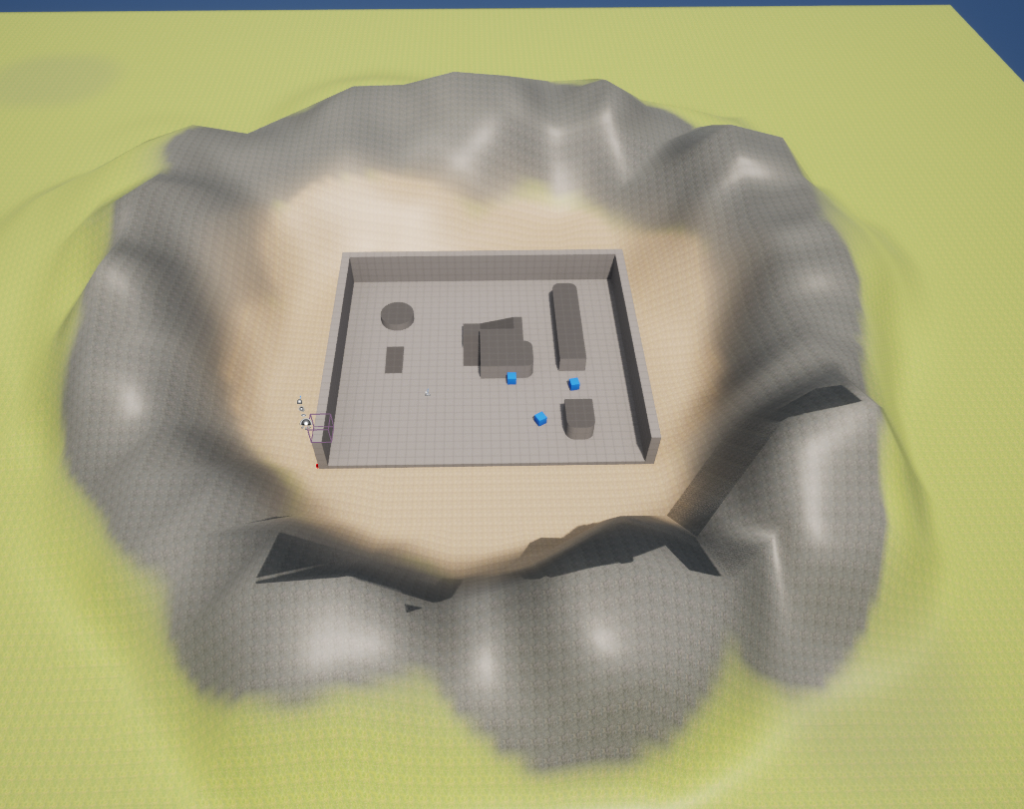
Next, I started to create a landscape (Figure 2) by using landscape mode, where first I created a new landscape by setting the layers to use with the landscape (Figure 3). These layers are used through able to paint over the landscape, which brings different looks to the environment of the game. Then, I had to set the location to generate the landscape, assign the number of quads like sections, and then create it. However, what I did challenging was creating the layers to use for the landscape as I had to create a new material where this could load the layers I wanted to use for the landscape.

To creating the layers with using a material, I had to connect the “Base Color” to “Layer Blend”. Layer Blend worked by creating indexes of how many I needed into its array and then defining each one with a name. When the index was set, I brought in a “Texture Sample” by loading the material I wanted and then connecting the “RGB” node to their appropriate layer name. With this, I started using the layer to paint around the landscape and sculpted a few mountain tops where these could be to create boundaries preventing the player from falling, as shown below.
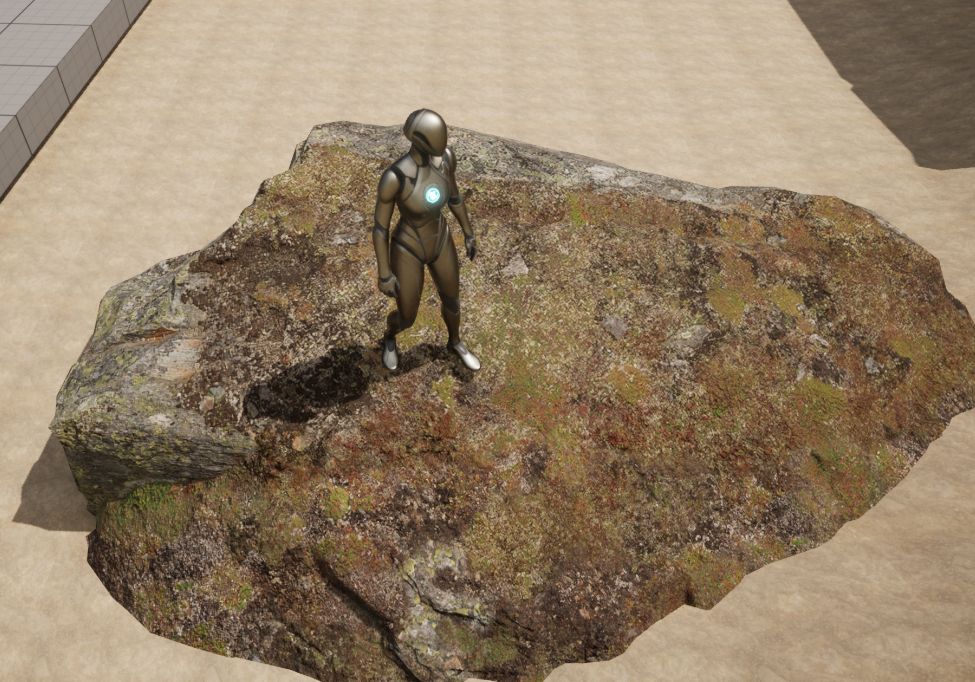
Overall, I was happy with how the landscaping tools turned out as I had experience with creating landscapes in Unity before, and I was able to apply some of my knowledge to that. Although I did find the process more challenging as this was my first time creating a landscape in Unreal. After that, I wanted to add some details to the landscape, like rocks that the player could walk on where these used complex collision boxes.

How I managed to set the complex collision of this rock was to load the rock mesh in a separate window that allowed me to create the collision that the mesh would have in the scene. First, I had to create a convex collision box, which will automatically generate the object’s mesh edges, faces, and vertices. Optionally, I could further adjust how many vertices I wanted for the objects, but the generation from the created box was enough for the player to easily stand on it and accurately has the slope shown below.
From my experience in doing the skills I learned here, I feel that I gained some skills around creating the environment. I could easily use these to create a small level environment to prototype with and add the game’s progression and mechanics to the level. The next direction is to start looking for assets in the marketplace to use for prototype to save development time for the project.